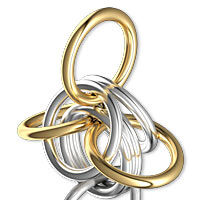
Queen's Link Chainmaille

Instructions
Tip: You can choose many jump rings that will work with this design. Keep in mind, the smaller the ring and the thicker the gauge of the wire, the more challenging it is to build this pattern.
Step 1
Using a pair of flat-nose pliers and chain-nose pliers, open 8 jump rings. Close two jump rings.
Step 2
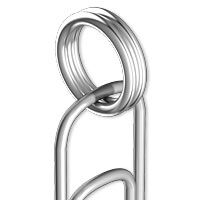
Pass a paperclip through the two closed jump rings.
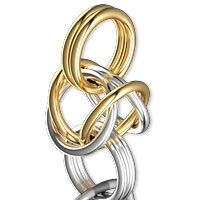
Note: Different color jump rings are shown for illustrative purposes, although do make for an interesting design.
Step 3
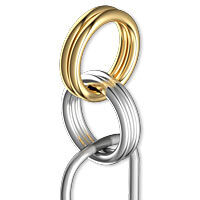
Pass one open ring through the two closed rings. Close the jump ring. Add a second jump ring to the two attached to the paper clip.
Step 4
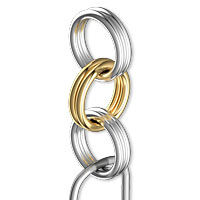
Add a second set of two jump rings to the set of jump rings added in Step 3, creating a chain of three sets of two jump rings.
Step 5
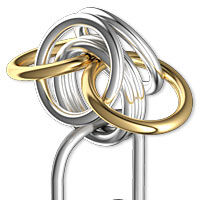
Flip the last two rings added, down so they hang as far down as possible. Separate the top two rings pulled down (shown gold).
Step 6
Pass an open jump ring through the tops of the now, top two rings (shown in silver). Close the open ring.
Repeat, adding a second ring in this same spot.
Step 7
Add two rings to the two new rings just added.
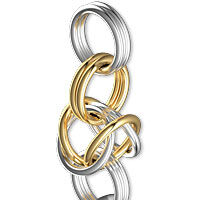
Repeat Step 5 - 7 for as long as your design or project calls for.
Have a question regarding this project? Email Customer Service.
Copyright Permissions
All works of authorship (articles, videos, tutorials and other creative works) are from the Fire Mountain Gems and Beads® Collection, and permission to copy is granted for non-commercial educational purposes only. All other reproduction requires written permission. For more information, please email copyrightpermission@firemtn.com.